
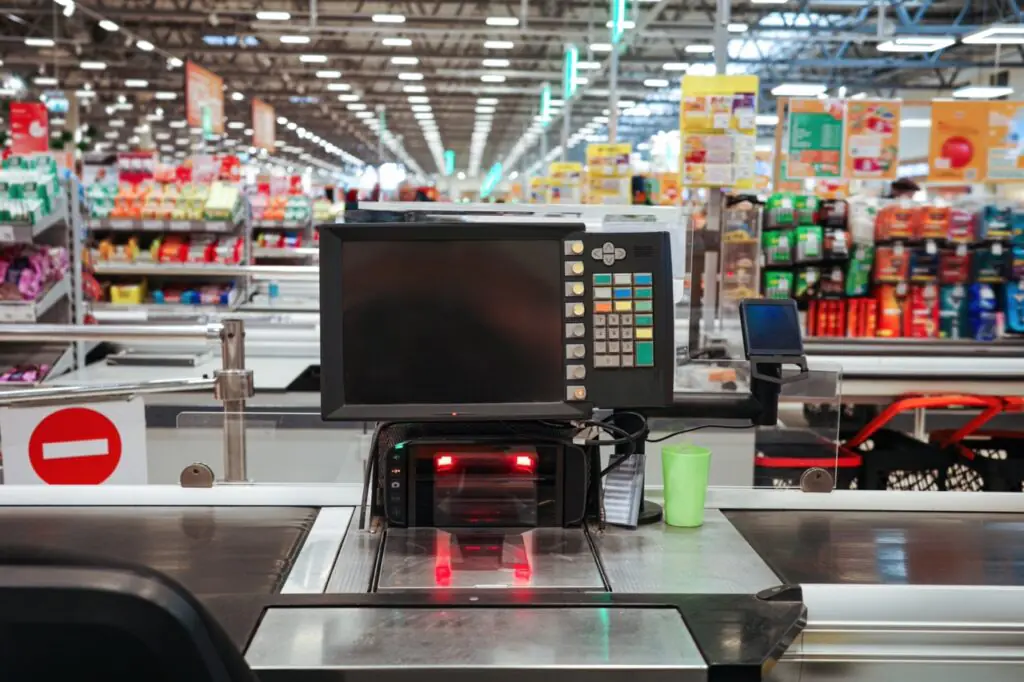
A checkout lane looks simple from the customer’s side of the counter. There is a belt, a screen, a scanner, and a person ready to help. Behind that simplicity is a long list of components that all have to work together: the terminal, display, scanner, scale, payment device, printer, cash drawer, power, network, mounting, and the physical layout itself. Missing even one detail can turn opening day into a scramble.
This checklist walks through everything you need to plan, buy, install, and test when setting up a new lane or upgrading an existing one. Use it as a working document and adapt it to your store’s formats and departments.
Plan Before You Buy
Start with the decisions that shape everything else:
- Decide the lane’s purpose: full-service, express, or a high-volume lane that handles produce and bulk items
- Size your total lane count using your transaction data, as our guide to sizing lanes to transaction volume explains
- Confirm which payment types the lane must accept, including EBT, eWIC, contactless, and digital wallets
- Decide whether the lane will have a scale, a self-checkout companion, or a handheld for line busting
- Set a budget that includes hardware, installation, networking, and spare equipment
- Confirm local requirements that affect layout and equipment
The Terminal
The terminal is the lane’s brain:
- Choose an input style that fits the lane, using our guide to touchscreen vs. keyboard terminals as a reference
- Confirm processor speed and memory are adequate for your busiest hours
- Check that the terminal meets durability needs for the environment, as covered in our guide to rugged POS hardware
- Verify mounting options and screen angle adjustment
- Confirm ports for every peripheral you plan to connect
The Customer-Facing Display
- Position the display so customers can see items and prices clearly without leaning or straining
- Confirm the display supports the content you want, including itemized prices and loyalty savings
- Check readability under your store’s lighting and glare conditions
- Review our guide to the customer-facing display and trust at the register for content ideas
The Scanner
- Choose a scanner type that reads damaged, curved, and mobile screen barcodes reliably, since digital coupons and wallet passes appear on phones
- Decide between a handheld scanner, an in-counter scanner, or a combined scanner and scale unit
- Confirm the scanner reads the barcode formats your products and coupons use, with standards maintained by GS1
- Plan cable length and a holster or stand so the scanner is always within easy reach
The Scale
If the lane handles produce or weighted items, the scale needs special attention:
- Confirm the scale is approved for commercial use, since weighing devices used for sale are regulated. The National Type Evaluation Program is the reference for certification
- Confirm integration with the terminal so weight transfers automatically, as our guide to connecting deli, produce, and bulk departments to your POS describes
- Plan calibration and inspection schedules, and check with your local weights and measures office for requirements
- Position the scale so it is level, stable, and visible to the customer
The Payment Device
- Choose a PIN pad that supports chip, contactless, and magnetic stripe, plus EBT and eWIC where applicable
- Confirm it supports the contactless and wallet payments your shoppers use, as our guide to contactless payments explains
- Verify the device meets current security standards. The PCI Security Standards Council publishes the requirements for PIN entry devices
- Position it so customers can reach it comfortably and shield PIN entry from view
- Review our guide to staying PCI compliant without a dedicated IT team
The Receipt Printer and Cash Drawer
- Choose a thermal receipt printer with fast print speed and easy paper loading
- Keep spare paper rolls near the lane
- Select a cash drawer with enough compartments and a secure lock
- Plan how the drawer connects, whether through the printer or directly to the terminal
- Review our guide to reducing cash handling errors for drawer procedures
Power
- Provide dedicated, properly grounded outlets for every device
- Add surge protection, and consider battery backup so a brief power interruption does not drop a transaction
- Plan power for the scale, display, printer, and any charging stations
- Label breakers and outlets so a failure is quick to diagnose
Network
- Run wired connections to fixed terminals where possible, since wired networks are generally more reliable than wireless for checkout
- Confirm wireless coverage for handheld devices if you use them
- Separate the payment network from guest wifi
- Document the network layout so troubleshooting is faster
The Physical Layout
Hardware has to fit the space and the shopper:
- Confirm lane width and belt length suit full carts and your typical basket sizes
- Provide bagging space and a place for completed orders
- Keep exit paths clear to avoid congestion
- Check accessibility requirements for checkout aisles and payment equipment in the ADA Standards for Accessible Design
- Set terminal height, screen angle, and reach to reduce strain, using OSHA’s ergonomics guidance
- Manage cables so nothing trails across walkways or interferes with cleaning
Our guide to designing a checkout lane that moves faster covers the layout decisions in more depth.
Software and Configuration
Hardware is only half the setup:
- Configure quick keys and screens for the lane’s purpose, using our guide to quick keys and customizable screens
- Set up user accounts and permissions, using role-based permissions to match each person’s responsibilities
- Map the scale, printer, scanner, and payment device to the terminal
- Confirm tax rules, tender types, and payment routing
- Load the product catalog and verify barcodes scan to the correct items
- Set up loyalty, promotions, and return rules
Testing Before Go-Live
Never open a lane without a full test:
- Scan a sample of items from every department
- Weigh produce and confirm price calculations
- Process each payment type, including EBT, contactless, and split tender
- Run a return and a void to confirm permissions work
- Print receipts and confirm the content is correct
- Open and close the cash drawer
- Disconnect the network briefly to confirm how the lane behaves, using our guide to preventing POS downtime as a reference
- Have a cashier run a mock rush of transactions and note any friction
Training and Opening Day
- Train every cashier who will use the lane before it opens
- Provide a quick reference guide at the lane
- Have a manager or experienced cashier nearby for the first shifts
- Know how to reach support, using the resources on FlexRetail’s support page
- Keep a spare terminal, scanner, and printer accessible
After Launch
- Review transaction times and error rates after the first two weeks
- Gather feedback from cashiers and customers
- Adjust screens, placement, and procedures
- Schedule regular cleaning and inspection
A lane that is planned carefully and tested thoroughly opens smoothly and keeps running. FlexRetail’s POS hardware is designed for grocery environments, and our overview of POS hardware built for the way retailers actually work shows how the components come together. Schedule a demo to review your lane plan with the FlexRetail team.